Anyone who wishes to prepare Grade concepts can get a strong foundation by accessing the Eureka Math Book Answer Key. People of highly subject expertise prepared the solutions in a concise manner for easy grasping. Start answering all the questions given in Eureka Math Book Grade 2 Answer Key. Refer to our Eureka Math Answers Grade 2 chapter 24 to enhance your math skills and also to score good marks in the exams.
Engage NY Eureka Math 2nd Grade Module 4 Lesson 24 Answer Key
Eureka’s Math Answer Key for Grade 2 meets the content and intent of the school curriculum. By using the Eureka Math Grade 2 Answer Key, you can understand the topics of all chapters easily. Detailed solutions provided make it easy for you to grab Knowledge and learn the underlying concepts. Download Eureka Math Answers Grade 2 pdf for free. Tp the links and practice well for the exams.
Eureka Math Grade 2 Module 4 Lesson 24 Problem Set Answer Key
Question 1.
Solve using mental math. If you cannot solve mentally, use your place value chart and place value disks.
a. 25 – 5 = ___20____ 25 – 6 = ___19___ 125 – 25 = ___100___ 125 – 26 = __119_____
Answer:
25 – 5 = 20.
25 – 6 = 19.
125 – 25 = 100.
125 – 26 = 119.
Explanation:
In the above-given question,
given that,
solve using mental math.
if you cannot solve mentally, use your place value chart and place value disks.
25 – 5 = 20.
25 – 6 = 19.
125 – 25 = 100.
125 – 26 = 119.
b. 160 – 50 = __110___ 160 – 60 = ___100___ 160 – 70 = __90____
Answer:
160 – 50 = 110.
160 – 60 = 100.
160 – 70 = 90.
Explanation:
In the above-given question,
given that,
solve using mental math.
if you cannot solve mentally, use your place value chart and place value disks.
160 – 50 = 110.
160 – 60 = 100.
160 – 70 = 90.
Question 2.
Solve using your place value chart and place value disks. Unbundle the hundred or ten when necessary. Circle what you did to model each problem.
a. 124 – 60 = __64____
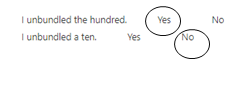
I unbundled the hundred. Yes No
I unbundled a ten. Yes No
Answer:
124 – 60 = 64.
Explanation:
In the above-given question,
given that,
solve using your place value chart and place value disks.
unbundle the hundred or ten when necessary.
124 – 60 = 64.
64 + 60 = 124.
b. 174 – 58 = __116____
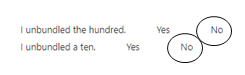
I unbundled the hundred. Yes No
I unbundled a ten. Yes No
Answer:
174 – 58 = 116.
Explanation:
In the above-given question,
given that,
solve using your place value chart and place value disks.
unbundle the hundred or ten when necessary.
174 – 58 = 116.
116 + 58 = 174.
c. 121 – 48 = __73____
I unbundled the hundred. Yes No
I unbundled a ten. Yes No
Answer:
121 – 48 = 73.
Explanation:
In the above-given question,
given that,
solve using your place value chart and place value disks.
unbundle the hundred or ten when necessary.
121 – 48 = 73.
73 + 48 = 121.
d. 125 – 67 = __58____
I unbundled the hundred. Yes No
I unbundled a ten. Yes No
Answer:
125 – 67 = 58.
Explanation:
In the above-given question,
given that,
solve using your place value chart and place value disks.
unbundle the hundred or ten when necessary.
125 – 67 = 58.
58 + 67 = 125.
e. 145 – 76 = __69____
I unbundled the hundred. Yes No
I unbundled a ten. Yes No
Answer:
145 – 76 = 69.
Explanation:
In the above-given question,
given that,
solve using your place value chart and place value disks.
unbundle the hundred or ten when necessary.
145 – 76 = 69.
69 + 76 = 145.
f. 181 – 72 = __109____
I unbundled the hundred. Yes No
I unbundled a ten. Yes No
Answer:
181 – 72 = 109.
Explanation:
In the above-given question,
given that,
solve using your place value chart and place value disks.
unbundle the hundred or ten when necessary.
181 – 72 = 109.
72 + 109 = 181.
g. 111 – 99 = ____12__
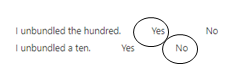
I unbundled the hundred. Yes No
I unbundled a ten. Yes No
Answer:
111 – 99 = 12.
Explanation:
In the above-given question,
given that,
solve using your place value chart and place value disks.
unbundle the hundred or ten when necessary.
111 – 99 = 12
12 + 99 = 111.
h. 131 – 42 = __89____
I unbundled the hundred. Yes No
I unbundled a ten. Yes No
Answer:
131 – 42 = 89.
Explanation:
In the above-given question,
given that,
solve using your place value chart and place value disks.
unbundle the hundred or ten when necessary.
131 – 42 = 89.
89 + 42 = 131.
i. 123 – 65 = ___58___
I unbundled the hundred. Yes No
I unbundled a ten. Yes No
Answer:
123 – 65 = 58.
Explanation:
In the above-given question,
given that,
solve using your place value chart and place value disks.
unbundle the hundred or ten when necessary.
123 – 65 = 58.
58 + 65 = 123.
j. 132 – 56 = ___76___
I unbundled the hundred. Yes No
I unbundled a ten. Yes No
Answer:
132 – 56 = 76.
Explanation:
In the above-given question,
given that,
solve using your place value chart and place value disks.
unbundle the hundred or ten when necessary.
132 – 56 = 76.
76 + 56 = 132.
k. 145 – 37 = ___108___
I unbundled the hundred. Yes No
I unbundled a ten. Yes No
Answer:
145 – 37 = 108.
Explanation:
In the above-given question,
given that,
solve using your place value chart and place value disks.
unbundle the hundred or ten when necessary.
145 – 37 = 108.
108 + 37 = 145.
l. 115 – 48 = ___67___
I unbundled the hundred. Yes No
I unbundled a ten. Yes No
Answer:
115 – 48 = 67.
Explanation:
In the above-given question,
given that,
solve using your place value chart and place value disks.
unbundle the hundred or ten when necessary.
115 – 48 = 67.
67 + 48 = 115.
Question 3.
There were 167 apples. The students ate 89 apples. How many apples were left?
Answer:
The number of apples was left = 78.
Explanation:
In the above-given question,
given that,
There were 167 apples.
The students ate 89 apples.
167 – 89 = 78.
so the number of apples were left = 78.
For early finishers:
Question 4.
Tim and John have 175 trading cards together. John has 88 cards.
a. How many cards does Tim have?
Answer:
The number of cards does Tim has = 87.
Explanation:
In the above-given question,
given that,
Tim and John have 175 trading cards together.
John has 88 cards.
175 – 88 = 87.
so the number of cards does Tim has = 87.
b. Brady has 29 fewer cards than Tim. Have many cards does Brady have?
Answer:
The number of cards does Brady has = 58 cards.
Explanation:
In the above-given question,
given that,
Brady has 29 fewer cards than Tim.
87 – 29 = 58.
so the number of cards does Brady has = 58 cards.
Eureka Math Grade 2 Module 4 Lesson 24 Exit Ticket Answer Key
Solve using your place value chart and place value disks. Change 1 hundred for 10 tens and change 1 ten for 10 ones when necessary. Circle what you need to do to model each problem.
Question 1.
157 – 74 = __83____
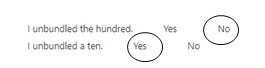
I unbundled the hundred. Yes No
I unbundled a ten. Yes No
Answer:
157 – 74 = 83.
Explanation:
In the above-given question,
given that,
solve using your place value chart and place value disks.
unbundle the hundred or ten when necessary.
157 – 74 = 83.
83 + 74 = 157.
Question 2.
124 – 46 = ___78___
I unbundled the hundred. Yes No
I unbundled a ten. Yes No
Answer:
124 – 46 = 78.
Explanation:
In the above-given question,
given that,
solve using your place value chart and place value disks.
unbundle the hundred or ten when necessary.
124 – 46 = 78.
78 + 46 = 124.
Eureka Math Grade 2 Module 4 Lesson 24 Homework Answer Key
Question 1.
Solve using mental math. If you cannot solve mentally, use your place value chart and place value disks.
a. 38 – 8 = __30____ 38 – 9 = ___29___ 138 – 38 = __100____ 138 – 39 = __99_____
Answer:
38 – 8 = 30.
38 – 9 = 29.
138 – 38 = 100.
138 – 39 = 99.
Explanation:
In the above-given question,
given that,
solve using mental math.
if you cannot solve mentally, use your place value chart and place value disks.
38 – 8 = 30.
38 – 9 = 29.
138 – 38 = 100.
138 – 39 = 99.
b. 130 – 20 = _110_____ 130 – 30 = __100____ 130 – 40 = __90____
Answer:
130 – 20 = 110.
130 – 30 = 100.
130 – 40 = 90.
Explanation:
In the above-given question,
given that,
solve using mental math.
if you cannot solve mentally, use your place value chart and place value disks.
130 – 20 = 110.
130 – 30 = 100.
130 – 40 = 90.
Question 2.
Solve using your place value chart and place value disks. Unbundle the hundred or ten when necessary. Circle what you did to model each problem.
a. 115 – 50 = ___65___
I unbundled the hundred. Yes No
I unbundled a ten. Yes No
Answer:
115 – 50 = 65.
Explanation:
In the above-given question,
given that,
solve using your place value chart and place value disks.
unbundle the hundred or ten when necessary.
115 – 50 = 65.
65 + 50 = 115.
b. 125 – 57 = ___68___
I unbundled the hundred. Yes No
I unbundled a ten. Yes No
Answer:
125 – 57 = 68.
Explanation:
In the above-given question,
given that,
solve using your place value chart and place value disks.
unbundle the hundred or ten when necessary.
125 – 57 = 68.
68 + 57 = 125.
c. 88 – 39 = __49____
I unbundled the hundred. Yes No
I unbundled a ten. Yes No
Answer:
88 – 39 = 49.
Explanation:
In the above-given question,
given that,
solve using your place value chart and place value disks.
unbundle the hundred or ten when necessary.
88 – 39 = 49.
49 + 39 = 88.
d. 186 – 39 = __147____
I unbundled the hundred. Yes No
I unbundled a ten. Yes No
Answer:
186 – 39 = 147.
Explanation:
In the above-given question,
given that,
solve using your place value chart and place value disks.
unbundle the hundred or ten when necessary.
186 – 39 = 147.
147 + 39 = 186.
e. 162 – 85 = __77____
I unbundled the hundred. Yes No
I unbundled a ten. Yes No
Answer:
162 – 85 = 77.
Explanation:
In the above-given question,
given that,
solve using your place value chart and place value disks.
unbundle the hundred or ten when necessary.
162 – 85 = 77.
77 + 85 = 162.
f. 172 – 76 = __96____
I unbundled the hundred. Yes No
I unbundled a ten. Yes No
Answer:
172 – 76 = 96.
Explanation:
In the above-given question,
given that,
solve using your place value chart and place value disks.
unbundle the hundred or ten when necessary.
172 – 76 = 96.
96 + 76 = 172.
g. 121 – 89 = __32____
I unbundled the hundred. Yes No
I unbundled a ten. Yes No
Answer:
121 – 89 = 32.
Explanation:
In the above-given question,
given that,
solve using your place value chart and place value disks.
unbundle the hundred or ten when necessary.
121 – 89 = 32.
32 + 89 = 121.
h. 131 – 98 = __23____
I unbundled the hundred. Yes No
I unbundled a ten. Yes No
Answer:
131 – 98 = 23.
Explanation:
In the above-given question,
given that,
solve using your place value chart and place value disks.
unbundle the hundred or ten when necessary.
131 – 98 = 23.
23 + 98 = 131.
i. 140 – 65 = __75____
I unbundled the hundred. Yes No
I unbundled a ten. Yes No
Answer:
140 – 65 = 75.
Explanation:
In the above-given question,
given that,
solve using your place value chart and place value disks.
unbundle the hundred or ten when necessary.
140 – 65 = 75.
75 + 65 = 140.
j. 150 – 56 = ___94___
I unbundled the hundred. Yes No
I unbundled a ten. Yes No
Answer:
150 – 56 = 94.
Explanation:
In the above-given question,
given that,
solve using your place value chart and place value disks.
unbundle the hundred or ten when necessary.
150 – 56 = 94.
94 + 56 = 150.
k. 163 – 78 = ____85__
I unbundled the hundred. Yes No
I unbundled a ten. Yes No
Answer:
163 – 78 = 85.
Explanation:
In the above-given question,
given that,
solve using your place value chart and place value disks.
unbundle the hundred or ten when necessary.
163 – 78 = 85.
85 + 78 = 163.
l. 136 – 87 = ___49___
I unbundled the hundred. Yes No
I unbundled a ten. Yes No
Answer:
136 – 87 = 49.
Explanation:
In the above-given question,
given that,
solve using your place value chart and place value disks.
unbundle the hundred or ten when necessary.
136 – 87 = 49.
49 + 87 = 136.
Question 3.
96 crayons in the basket are broken. The basket has 182 crayons. How many crayons are not broken?
Answer:
The number of crayons is not broken = 86.
Explanation:
In the above-given question,
given that,
96 crayons in the basket are broken.
The basket has 182 crayons.
182 – 96 = 86.
so the number of crayons is not broken = 86.